Arrow Shaft Lengths
Before preparing any arrows we need to have the shaft at the correct length, as most arrows are cut from the front, so we need to cut them before adding points. When ordering your arrows archery retailers will cut them to your specification. Or you can purchase arrow shafts at stock lengths and cut them yourself with an arrow cutter.
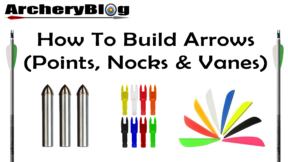
Arrow Points
Make sure you purchase the correct size points for your arrows and that they are the correct grain weight that you require, sometimes you don’t get a choice of grain weights for your arrow, but sometimes you do.
Points are traditionally glued into place with a hot melt glue. I don’t use special glue just a standard craft glue stick. You need to heat the point so that the glue melts when you apply it to the point and then (without burning yourself) insert the point into the arrow shaft and allow it to dry.
To heat the points I have used a soldering iron, but from now on I shall be using a heat gun that I bought myself that is made by Tack Life. I heated the gun to 150 degrees and heated the points first.
Inserting Nocks
Nocks need to go on next as we need those in place in order to use the fletching jig next. There a lots of different nock choices, some specific to the size of your arrow shaft, so make sure you get the correct sizes, the same can be said for the arrow points as well. Nocks can be push in nocks, pin nocks or outer nocks. I regularly use Easton Nocks – G Nock Smalls. For handling most nocks I use a nock tool, this one in the video is made by Easton. They make 2 sizes, mine is for the smaller nock. It allows you to push and rotate the nock at the same time when inserting it. As I find it a lot easier to get the nocks in doing it this way.
Gluing on Vanes
Unless your putting on spin wings (which are applied with double sided tape), plastic and feather vanes need to be glued to the arrow shafts. Check out a range of arrow vanes on Amazon. Please don’t use super glue, but a proper arrow vane glue. I have used the Easton gel which I like, but lately I only use Dragon Spit glue. Fletching jigs are quite cheap to buy and most do the same job, but you may find one you prefer working with. Your archery club may have a jig that they can lend you.
We insert the arrow with the nock on into the fletching jig and make sure that the jig is set to rotate 3 times evenly. We then place our vane into the clamp and add our glue along the vane edge. We then place the clamp into the jig and slightly press down on the arrow shaft to get a good bond between the vane and the arrow shaft. Remember to wipe off any excess glue from both sides of the vane.
Allow to dry for a few minutes before removing the clamp and rotating the jig to then carry on and glue on the the next two vanes, until you are finished.
Don’t shoot the arrows straightaway but put it aside to dry for another hour or two before shooting.
Finishing Off
Finally rotate your nocks to make sure they are in the correct location for your set up depending on whether you shoot compound or recurve.
Arrow Building Video
If you want to watch me actually building my arrows, instead of me talking about it, please watch my arrow building video on my YouTube channel.
![]()
https://youtu.be/9CS10cVFbOg?sub_confirmation=1